Welcome!

Thank you for visiting my blog; it is an exciting venture for me and I hope this will become a forum for moms and homemakers of all types to share stories, frustrations, and triumphs. There will be recipes, pictures of my latest and greatest soap creations, and anything I think will be interesting to Enthusiastic Homemakers.....

Monday, February 14, 2011

The shoemaker's wife is barefoot...and my husband has no soap!

I love the old Ivory Soap ads...not that I am old enough to remember this particular ad; but I remember the 80's ads for Ivory; they always had the most beautiful pictures, and the cutest babies! Maybe I was always meant to make soap; I've always loved to get a new bar of soap, unwrap it, and display in my bathroom. I remember wanting to keep soap in a pristine condition by not using it; I always loved the designs stamped into the bars, and the "feel" of a brand-new bar of soap....ahhh, but I digress!

The reason for the title of the post is that ever since I've started selling my soap, I have been terribly reluctant to actually use my soap myself! I've gotten such kind compliments from people, and I truly enjoy making something that people enjoy. Meanwhile, I'm looking wistfully at bar after bar of my soap in my drying closet; still working my way through my early attempts, scratch and dents, and slivers of my soap! Although I do always test each batch for gentleness by washing my hands with the trimmings, I must confess there are several varieties I have not used! So tonight, in the spirit of taking care of myself so that I can be the best wife and mother; I took a deep breath; opened my drying closet, and picked out a soap! I have to admit; it was an imperfect soap, one that I was saving for free samples, but I felt like a kid in a candy store! I also used a shampoo bar, and gave my poor husband a pristine, saleable bar of the soap I made with him in mind! Poor thing, he's been using a tiny of sliver of soap for who knows how long; he confessed he was afraid to ask me for soap! I feel terrible! The reason I started making soap in the first place was provide high-quality soap for my family; it seems that I may have lost sight of that a little; I hope to keep balanced in my endeavors and make sure that I'm taking care of my family above all; the rest will take care of itself. I must admit, I feel quite refreshed, after lathering myself up with soap I was pleased with, then slathering myself with mounds of shea butter lotion. I made it after all; I shouldn't be going around with dry skin! What kind of example does that set?  

On a side note; I got so much sewing accomplished last night. I was feeling tired and headachy and grumbling about getting my sewing stuff set up. As soon as I got into the project; I immediately felt energized and wonderful; I truly must remember my love of sewing, and that no matter how tired I may feel, a good project aways gets my creative juices flowing, and it's so worth the effort! I hope to do more sewing after I finish this post; hope all of you have a great evening!

Sunday, February 13, 2011

My Name is Brandi; and I'm addicted to patterns.....I'm also REALLY bad at math!


Ok, full disclosure; the post I made yesterday; about homemaking: I just realized now that 1951 was in fact; 60 years ago; not fifty....

Wow; no more late-night blogging for me!
*embarrassing*

Today I woke up, ready for action; and while checking my etsy shop; noticed that one of my favorite shops Vintage Treasure Huntn had added some new patterns; and there were a few I just could not pass up; even though I have lots of patterns, lots of fabric; and almost no time or energy left! The one above is the one I finally decided to purchase; after justifying the expense six ways to Sunday and vowing to make it worth it by not buying new clothes for the next decade, at least!

Fortunately, Vintage Treasure Huntn has very reasonably-priced patterns; very much in the grasp of a budget-minded mama like me! The fact that it is my size made it seem like Serendipity; I just couldn't say no! It is a "half-size" pattern, which means a petite, but it's very easy to alter that, and the fact that I'm only 5'5" makes it even better. I have some fabric that would be perfect for this, probably the pink linen that I posted a picture of earlier, although I have to say I'm completely in love with the blue/grey with contrasting cuffs and belt, as shown for view A. I also have some navy blue and white polka dot, that may work, and the red accents for that would be darling. I'll have to wait until I get it, once the pattern is in my hands, inspiration just seems to flow better!

And I must, must, must make more time to sew this week; I don't want all my beautiful patterns to go to waste!

Saturday, February 12, 2011

Homemaking; Fifty Years Later...

"If you're tired from overwork, household chores you're bound to shirk.
Read these pointers, tried and true
And discover what to do" ~ From the Betty Crocker Cookbook, 1951 edition

When I first bought the book from which this advice originates; I was amazed by the matter-of-fact assumption that a woman would aspire to do this very underrated job: make a home. All the directions and advice were geared directly toward women; because of course in 1951, the home was the woman's domain. There was no shame in it, no pressure for a woman to come up with gourmet meals and climb the corporate ladder at the same time. The cookbooks were written with the homemaker in mind; with tips from start to finish on stretching that grocery budget, keeping meals nutritious, colorful and interesting, and curiously for a cookbook, tips for the woman on staying healthy and keeping her spirits up. Feminists everywhere faint in horror; but as a homemaker myself, I find the treatment of that hardworking homemaker charming and sweet. In addition, I've found that the advice is surprisingly practical and ageless. Some of the menu plans are a little quaint; that is to say, I've never served this on "Some Sunday Night"...or ever!:

Welsh Rarebit with
Tomato Slices, Anchovies, and Gherkins
Chilled Pears
Chocolate Cupcakes
Coffee, Milk, or Tea

I do think it would be fun to try out some of these menus, get a real "flavor" from the past! (perhaps another project to undertake?)

Friday, February 11, 2011

If there's a cure for laundry; I ain't found it!


Happy Friday! I know on this blog I've bemoaned the constancy and volume of the laundry in my busy house, so I decided to make it an actual topic,  rather than just a complaint, and share some tips I've learned over the years and mountains of laundry. Just to give you an idea of the vast scope of the laundry that is done in this house, I've posted the picture below, which is clean laundry waiting to be folded. This is not the biggest mountain I've ever had, this is my normal laundry pile that is produced ever other day!

Just to keep up, I wash and dry at least two loads on the "off" day, as well as about five loads on the days I plan to fold. And don't get me started on the sheets! My problem with laundry started when I was quite young. We had a large family growing up, and I often folded laundry with my sister. Actually, my sister folded, and I sat and cried because I hated laundry so much. So, the joke's on me, because I got married and had five little boys, and there is nearly as much laundry now as when I was a little girl, crying because I had to fold part of it!


And unfortunately, I have looked far and wide for a cure, and have found none! The only way around laundry is through it! In order to reduce the cost of doing laundry, at the very least, I found a way to make my own laundry detergent that costs only .03 per load, instead of the 15 or more cents per load using the Costco size natural laundry detergent. It's easy to do, with ingredients that are readily available, and it works; it really does! So here is the "recipe" I use:

For 1.5 gallons (the size of the empty laundry detergent jug I have)

4 oz Fels Naptha Soap, grated
1 Cup Borax (my fave)
1 Cup Washing Soda (like Baking soda, but in the laundry aisle under that name)
Water (preferably distilled, but I use tap water all the time)
A few drops of the essential oil of your choice (lavender, lemongrass, lemon, are all nice)

Melt the grated soap in a saucepan with 2 cups water. Warm up more water and add about 3/4 of a gallon to the laundry jug with a funnel. After the soap is melted, add the borax, washing soda, and essential oil, until they are all combined and dissolved. Add mixture to the jug, then fill with more warm water to the top. Shake often as the mixture cools, and before each use. Use 1/2 cup per load; warm water cleans the best with this; as most detergent.

So I may not have found a cure; at least not easily obtainable (think delivery laundry service....) but at least you can save a little money, as well as use something that is not petroleum based and is free of surfactants. I will post later about my folding system; and I will keep dreaming about that cure!

Check out my new feature; tips from a 1951 cookbook on thriftiness and homemaking, I will be posting a new tip every day!

Thursday, February 10, 2011

Lipstick Blues....and Reds and Pinks

This is a first for me! I'm certainly no http://vavoomvintage.blogspot.com and I don't normally talk about fashion, but I felt compelled to blog about something that has given me all sorts of problems for years now. Lipstick. I've always loved makeup, loved wearing it, buying it, seeing it, experimenting with it. From the very first time I was allowed to wear makeup out of the house, I've always wanted to be a red lipstick wearer. In fact the very first time I was allowed to wear makeup out of the house, I was first required to remove the red lipstick I had applied! Red lipstick is to me, vintage glamour personified. From the very first Technicolor movies, I have watched gorgeous blondes and redheads with coloring similar to mine pull off the very reddest of the red lipsticks. This is a case where life does not imitate art! I have bought scores of red lipsticks, all claiming to be flattering to a fair complexion, all claiming to be low maintenance and smear and smudge free, comfortable, lasting, wonderful and beautiful. It is all lies! Lies! Red lipstick is not for the faint of heart! It requires constant peeks in the mirror, which I don't have time to do, even the long lasting stuff wears off eventually, leaving a horrible red ring around your lips, and the long-wearing kinds is devilishly uncomfortable, since it makes your lips feel like they are Spongebob when exposed to a heat lamp. I have purchased and tossed more lipstick than I care to admit, usually settling for lovely smooth lip balm and maybe a non-sticky lip gloss. I finally came to the conclusion that I am simply not a red lipstick lady, and decided to expand my horizons. I remember reading some review for Revlon Matte Lipstick, as being very vintage-y; and I decided to see going over to the dark side of a pink lipstick would suit me better. It is lovely! The lipstick itself is smooth and comfortable and the color Pink Pout is so similar to my natural lip color that it doesn't require constant touch-up and care. It also has the bonus of not making my rather large mouth resemble clown makeup; which is the other problem I've always had with red lipstick. For me, anyway, there's just so much red, it makes me feel like my lips arrive 20 minutes before the rest of me. I'm sold! I'm a pink lipstick lady now!

Wednesday, February 9, 2011

I can see it in your eye; that you want to make pie....

I decided to put up a post about one of my favorite things; pie. I just happen to have a half bushel of apples that are mocking me; reminding me daily by their presence that I have a million things to do that I never seem to get around to doing. So in the spirit of pie making, and with hope that I will, in fact, use the apples for the purpose with which they were intended, I decided to share a few things about pie that I have learned over the years, mostly from that lovely lady, Betty Crocker. As I talked about on an earlier post, my favorite cookbook is a reprint of a 1951 Betty Crocker; the pictures are charming, the recipes a dream. It provides a glimpse into the daily lives of my favorite of the species; 50's housewives. There is a wonderful section which gives tips on stretching the family budget as well as keeping your spirits lifted; no therapy required. I actually think I will post about those tips at a later date; they are just priceless!

I always use Betty's version of a pie crust, it's so simple! Modern cookbooks make the process seem so difficult and time consuming; when it should be....easy as pie! You don't need the finest quality butter, or a food processor, or special flour, or special equipment, just flour, shortening (I know, I know), cold water, and either a pastry blender (which is just a little hand-held gizmo), or two forks. Also, modern recipes call for a higher percentage of fat to flour, which is just not necessary. The recipe I use calls for 2/3 cup of shortening per two-crust pie, certainly not health food, but I have seen other recipes use almost equal amounts of butter to flour! And I just roll the dough out with a wooden roller, no fancy-dancy new models with Teflon, on my wooden cutting board. I would love to have a marble inset to my counter top for dough; but for now, wood it is!

The problem with making pie, is that it is a fairly time-consuming dessert, so last time I made pie, I came up with a new technique, based on something my Granny used to do while making pie. Some of my best memories of my Granny are from my visit to her home in Missouri when I was eleven, she loved pie, and loved baking pies, so my sister and I helped her while she made lots of fruit pies. She came from a time and a place where pie was a staple, more of a way to preserve and a vehicle for fruit than a fancy dessert. She told us that while she was growing up in the 1930's, her mother used to make a dozen pies at a time. I always think of that when I bake pies; and hope that my pies would be Granny-approved! I remember her making the filling and then freezing it for another time, since she didn't have enough pie tins or oven space, so last time I made pies I did something similar. I don't claim that this is completely my idea, I'm sure other ladies have figured this out long ago, but for me it was a new idea!

I simply made enough filling for an extra pie, and placed it in a pie tin with no crust, greased. I did this with cooked filling, but I'm sure you could do this with the uncooked filling as well. I then baked that pie tin with just filling until it was done, then cooled it in the pie tin and when it was cool, stuck the whole thing in the freezer. I froze it until solid, then popped the filling out of the pie tin, wrapped it in plastic, and put it back in the freezer. When I needed a fairly quick dessert some weeks later, I simply made up a pie crust in the same pie tin, added the frozen block of filling, topped with another crust, baked as usual. It made a delicious, fresh-baked pie, and since the filling is the most time-consuming part, was ready in a snap! Of course, you can also freeze entire pies, but that requires putting pie tins out of commission, but I haven't had the greatest luck defrosting whole pies, and the crust has a tendency to become soggy when frozen. 

Now, do you want to make pie?

Tuesday, February 8, 2011

Gerber baby without the Gerber!

This vintage Gerber advertisement made me laugh! I didn't realize my baby was saying "Mm mm for Meat"! I have been making homemade baby food since my first baby, Andrew; but I've always "filled" in with jarred food at times, like Gerber. There's just nothing as convenient as being rushed on a busy morning and grabbing a jar of baby food! And then too, there are some things that, try as I might, just are not possible to make in a home setting without certain equipment. For example, how in the world do the baby food companies create banana puree that is neither stringy nor discolored? I know they add ascorbic or citric acid (just vitamin C) to the mixture to prevent the color from changing, but I have never been able to make such a smooth puree of bananas. I've tried using a food processor, which usually changes even the most stubborn of foods into puree easily; but bananas stay clumpy and stringy no matter how hard I try!  I think they must cook the bananas in some fashion, then liquefy and strain. Needless to say, I often buy jarred bananas. In addition, there are some fruits and vegetables that are not readily available in my area, and any of those varieties that I could purchase would be out-of-season and not the greatest quality. I've given jars of things like mangoes, plums, peaches, and blends of things I don't often (or ever) have on hand, like Mango Risotto. For most other things, and to provide the basics, I make baby food, which always seems more daunting than it really is. Some people like to go the old-fashioned route, and use a baby food maker that works on a hand-crank, but that requires buying the silly thing, and I've never been able to justify the expense. I used to use my good 'ol Kitchen Aid blender, but that meant dragging it and all it's parts, and making a huge quantity of one food at a time; not ideal. A few years ago, I got a small, simple 2 cup food processor, which I love for making salad dressings and chopping garlic; then found it was perfect for whipping up some baby food with a minimum of cleanup. I even have plans to use it when Elvis begins eating more variety; to quickly mash table food. For purees, this is what I do.

Scrub, Peel and chop into chunks harder foods; like root vegetables or apples.

Put into a microwave safe bowl, add a small amount of water and pop in the microwave. Cook in 5 minute increments until soft. Add some of the fruit or vegetable, along with a little of the cooking water to the bowl of the food processor, pulse until pureed; adding water as needed until it reaches desired consistency.

For other foods, like soft fruits, peel by placing in boiling water, then "shocking" in icy water, a process also called blanching, then follow the same procedure as above; although the fruit may be sufficiently cooked by the peeling process, and probably needs less water in the pureeing process.

You can also do this with meats; fair warning, pureed meat is not appetizing, but I have done this by boiling a chicken breast  which is well-trimmed, then pureeing with small amount of cooking liquid, then straining through a strainer. This could also be done with beef, although I don't want to think about boiled beef; but the end product is great mixed with some vegetables or fruit or cereal and given for a "dinner".

After the food is pureed, I spoon it into an empty (clean) ice cube tray, freeze until solid, then pop out the cubes and store in a Ziploc bag in the freezer; well labeled because frozen cubes of food start to look the same after a while, and it would be bad to accidentally give your baby pureed chicken instead of applesauce in his or her morning cereal! It's also a good idea to warn your family members about the ice; James has received a shock a few times when pulling out an ice cube tray for ice for a drink and finding it full of food! He warned me that it's only a matter of time before he serves himself a quite unusual drink!
In this picture; I have made a small batch of applesauce along with a small batch of sweet potatoes, and divided the food into one ice cube tray. I also love to create my own blends of food, by simply putting a cube of two of a few different, complimentary foods (like apples and sweet potatoes) into a bowl, putting it in the microwave on a low setting until thawed, then combining. Of course, you must be careful of "hot spots" when using the microwave; it's best to leave the thawed food out for a while to be sure it has time to cool. None of my babies have ever preferred warmed-up food, and that makes it easier to be sure I'm not going to burn them with hot food.
As you can see, it's very easy and economical to make your own baby food; no special equipment required!


Monday, February 7, 2011

Foolproof Busy-Day Bread.....


I posted earlier about making bread for my family and want to share the recipe I use. It's always difficult for me to share recipes, because I'm a "throw it in" kind of baker, especially when it comes to bread, but this method I use is actually based on an episode of 'Cake Boss'. Some of you may have seen it; when Buddy and family went to Italy, they stopped in a bakery that makes bread daily in a centuries-old wood fired oven. The bread looked absolutely delicious, and although I don't happen to have a centuries-old wood fired oven handy, and in fact only have a years-old floor model from Sears electric oven, it still makes awesome bread! In the episode of 'Cake Boss', the baker was asked what their secret was. He answered that it was "the air" in that particular region of Italy that made the bread so great; alas, I have no Italian air, only Idaho air, but the bread doesn't seem to notice. I make all my bread dough in my Kitchen Aid mixer that was a wedding present, and is something I still use every day and couldn't live without, but you can certainly use a little elbow grease and mix and knead the bread by hand. I developed this recipe by listening carefully, or rather, reading the subtitles when the baker said "5 grams salt per kilo flour". A rough estimate of 5 grams is 4 teaspoons, and that's the amount of salt I use per kilo, which is about 2.5 pounds. This seems like a lot of salt, and I've actually found you can reduce it a little without affecting the recipe. I should also add that instead of bread pans, I love making bread in the traditional Italian fashion, round loaves which are formed by making a simple dough ball, smoothed over with ends tucked into the bottom, slashed on top once with a knife, on a baking sheet. Cornmeal is good to sprinkle on the greased pan, but I generally forget to do this, and it's not crucial. So here goes:

Busy-Day Italian Bread

2.5 pounds unbleached flour
4 tsp. salt
4 tsp. active dry yeast
Warm water (think warm bath temperature: 100-120 degrees)

Add the dry ingredients to a stand mixer bowl, or other large bowl. Mix with wire whisk. For stand mixers, use the dough hook attachment, add warm water while mixing on the lowest setting. By hand, add some water, then mix with a wooden spoon. When dough starts coming together and pulling away from the bowl, or becomes too stiff to mix with spoon, stop adding water and mix away until a soft, slightly sticky, smooth dough forms. With mixer, continue to mix with dough hook, which kneads the dough,  for a few minutes, until everything is well mixed and the dough is smooth and while soft, is able to be removed from the bowl in a big dough ball and handled with floured hands. If you've added too much water, just add a bit more flour, but don't overdo it, it should still be a soft dough. If you're kneading by hand, knead your little heart out, it will take probably 10-15 minutes of vigorous kneading to reach the same point. Cover bowl and allow to double in size, an hour or so, then punch the dough down, divide it in half for two large loaves, form loaves on greased and cornmeal-ed baking sheet and cover with a towel. At this point preheat your oven to 400, and put the rising bread on top of your range, to allow the heat from the preheating oven to accelerate the rising process. The second rise is faster, in my oven the bread is ready to go as soon as the oven finishes preheating, probably 20 minutes to a half hour. Pop the bread in the oven and bake until golden brown, about 30 minutes. And that's all there is to it!

If anyone needs me to clarify anything or has further questions, please comment and I will respond with whatever help you need (short of actually coming to your house and baking the bread myself!). Enjoy!

I'm so sorry there are no pictures of this bread! I never thought to take any, but I will take photos later today when the bread for today is finished, to show!

Saturday, February 5, 2011

Vintage Success....one down, LOTS to go!

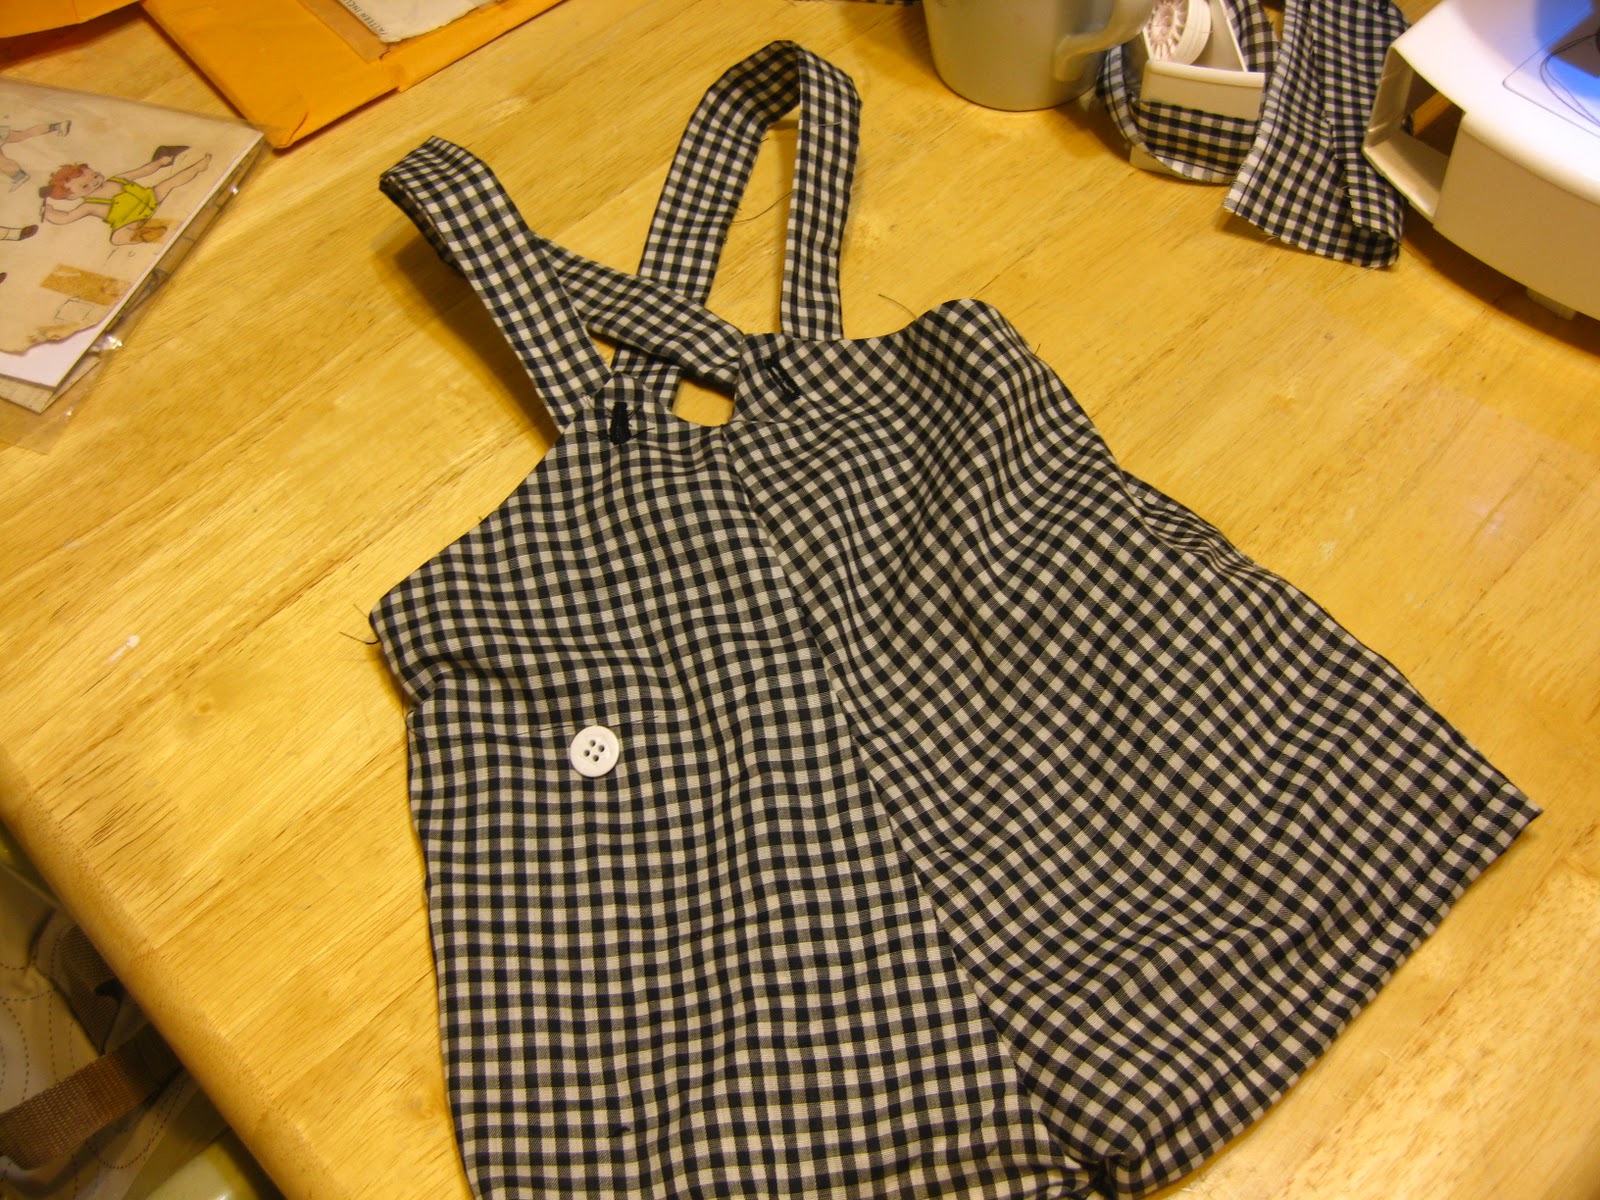
I posted a few weeks ago about a vintage sun suit I was making for Baby E, along with lots, and lots, and lots, of projects I intend to finish before our much-anticipated vacation at the end of March. I've been trying, and trying to find time for my sewing, but lately it has been difficult to fit it in to my ever-busy schedule. Tonight James had a late soccer game, so I was able to do some of my other chores, like making more Crunchy Mama soap for my etsy shop while he napped. I was so close to being finished with the sun suit, I only needed to do the dreaded buttonholes, and of course the normal hand-sewing and trimming thread duty that I despise. So here, at long last, is the finished 1955 sun suit; with shaky atrocious buttonholes! Fortunately, I found adorable buttons with anchors on them to lend a nautical air, and to hopefully disguise my usual wretched buttonholeing when the suit is worn this summer! I loved this pattern, straightforward, simple instructions, and a new twist, a technique I've never encountered before; flat-fell seams, where instead of sewing the side seams with right sides together, which makes a seam allowance on the inside; you sew the side seams wrong sides together, then on the right side, trim one of the seam allowances, then lap the other allowance over it, making a clean line, then top-stiching over all. I love to learn new (old) techniques, that's what makes vintage sewing so interesting, you never know what kind of instructions you may find, and it challenges your skills as a seamstress.


Also, I am at this moment, defying my self-imposed curfew, but since James is out playing a soccer game, and it is a weekend, I decided that it was allowable! No pumpkin-ing for me! I hope to be productive while I have this little opportunity, and perhaps even sleep in just a bit in the morning!

Thursday, February 3, 2011

Desperate Housewife

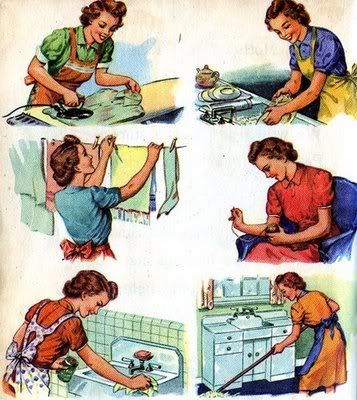
No, I'm not talking about the TV show, which I do not watch, but about little ol' me! It seems that this whole having-five-children-and-an-etsy-shop-and-attempting-to-make-a-new-wardrobe thing got a lot harder all at once! I don't know where the time goes! I wish I could be like this woman in the pictures, blissfully and serenely making her house beautiful calmly, all while wearing a plethora of colorful aprons, but the reality is, I am often frazzled, harried, annoyed, panicked, and most of the time wearing a layer of baby food, flour, or something worse over the outfit I choose hopefully in the morning. There are a few things I insist upon, one of them being that I get fully, fairly nicely dressed every day before taking my boys to school. I just feel so much better about life when I can at least put on some lipstick and go out into the world. I know lots of mothers who bring their children to school in pajamas, and think nothing of it; I don't judge them, in fact I admire their ability to "roll with the punches" and adapt to whatever is going on that morning, but for myself, I just can't mentally go there. The other thing that is important to me is to have my house looking as clean and inviting by dinnertime as I can make it. Now, I'm not married to a tyrannical, oppressive husband, and I know James would never fault me if he came home to a topsy-turvy house, but I feel as a homemaker, this is my foremost job, and I just wouldn't feel like I accomplished anything if I hadn't made significant progress on the home front by the time James got home. The sad truth is that the house often starts out looking great in the morning, and becomes progressively worse as the day wears on, despite my frenzied efforts to the contrary, and this bothers me. It seems like I should be getting somewhere for my efforts, and I guess staying ahead of the mess five children can make is a difficult task, but really? As I said in an earlier post, it is often close to midnight before I feel my job is done for the day, which gives me exactly seven and a half hours in which to sleep, sew, and make soap. Hardly enough. I need to either get on a better routine, or clone myself! I think I will start by allowing myself the breaks and the rest I need, because I think I will be much more effective if I start getting more rest. That brings to mind an old saying, which I recall from 'Mary Poppins', but I'm sure is much older than that, "Well begun is half done". I can hardly begin things well if I am not getting enough rest, so I vow to go to sleep no later than midnight from now on! EEK! That will be a hard one to stick to!