Welcome!

Thank you for visiting my blog; it is an exciting venture for me and I hope this will become a forum for moms and homemakers of all types to share stories, frustrations, and triumphs. There will be recipes, pictures of my latest and greatest soap creations, and anything I think will be interesting to Enthusiastic Homemakers.....

Showing posts with label baking. Show all posts

Thursday, May 5, 2011

Red Rompers and Red(dish) Velvet Cake

Elvis Modeling his new romper   

Wow; Spring has finally sprung! It's been a very cold and damp spring; which happens every few years here; it seems that it will always be winter; and then, POOF! Spring! A late spring, but spring nonetheless! Today the weather was just gorgeous; 75 degrees and beautiful sun. I'm sure we'll still have some damp weather over the next few weeks, but days like this are such a treat!

Today I received a romper in the mail from Mary Beth at Monkey and Friends. She's sending me an outfit for each of my boys who wear the sizes of clothes she makes; in return for taking a few pictures of my boys wearing them. What a deal! It's a win-win situation, because she doesn't have to hire a model, which can get expensive. Although I must say, I feel I've gotten a better deal than she! The romper for Elvis is just gorgeous, the fabric is high quality and adorable, and her workmanship is just superb. I can't compare to her skill at all! I snapped a few "unofficial" pics of Elvis, because I was so excited at how cute he looks in it! Tomorrow, I'll be having a photo shoot with him in our backyard....come to think of it; I better put the romper in the wash, because it was so darn cute on him I left it on him the rest of the day!

I also made us our slightly belated anniversary cake; using the recipe for Red Velvet cake I blogged about a few months ago. I felt very rushed and although the batter was a bright red color, I was initially disappointed that the finished cake was only slightly red. I think next time I need to add more food coloring. The frosting is cream cheese, which I love; but I had to quickly frost the cake while making dinner in a big rush (as always); and so I didn't make as pretty a cake as I would have liked, had a had more time. I bought chocolate covered strawberries to garnish the cake with, a fun treat that is sold at our grocery stores bakery; and one of those things we always drool over but never buy. The cake was quite delicious, but not exactly Food Network material; but I'm glad I made it. I usually make a cake for our anniversary, and try to make a new recipe every year; this will definitely be in my cake arsenal; to bake when I have the time (and the red food coloring).

I also finally made it back to the gym; after completely neglecting it from around the time of our vacation, because I was literally working 18 hours and day and felt I couldn't get away. I am really trying to find a better balance; and doing things that are important to me; whether or not I feel I have the time.

I have plenty of stories about things I've done in an effort to find balance; more to come!

Happy Friday!

Friday, March 18, 2011

An Apple Pie a Day Keeps the Doctor Away

We've slowly been recovering, and my poor boys are almost all better! Some of them have lingering coughs, and two of them never got sick at all; and I'm hoping our luck will hold. I'm trying to think of all the last-minute things I need to do before our vacation, and one of them is to use up the half-bushel of apples I bought optimistically a few weeks ago. Although I'm storing them in the garage, I don't want them to go bad while we're gone, so I've decided to go on an apple pie baking blitz. I figure that if I make an apple pie every day, or two every other day, I should use up all the apples before we leave. Yesterday, I baked pie #1; it seems like forever since I've made a home-baked dessert and it made the house smell awesome! My boys were all thrilled, they love apple pie, and I felt like I had accomplished a lot that day, even though I didn't.

I think I've been pushing myself too much lately, I've been unusually tired, and the joy I used to have creating and selling my soaps has seemed to be replaced by feeling that I've fallen short, not just at that, but that I've let it take over my life a little too much. I have a tendency to be a perfectionist, and although I told myself when I started that I would be happy if I only made one sale, soon I found myself glued to the activity feed! I think I'm going to concentrate on the joy of it again, and if it's true that a "watch pot never boils"; well, maybe it's true that a "watch etsy-shop never sells"! And I am looking forward to my first Farmer's Market, I love Farmer's Market's and it will be so scary and exciting to have my own (shared) booth! I'm already planning my display and decor, with my snazzy new apron that Rita, a fellow etsian at Lazy Mondays made me. I've made "Idaho Dirt" soap, "Clean Air" soap, and have a lot more planned that I hope people in an open-air market will like!

For now, I need to concentrate on my sewing, which is my one true love; and getting ready for our vacation, that is so close now I can taste it. I almost can't believe we're actually getting to go to Disneyland, I think I've avoided thinking too much about it, because it seems almost too good to be true!

Since it's a Friday night, I can stay up as late as I want, watching old movies and sewing old patterns, my favorite! I may work it some new soap "flavors" I have planned. I have more consignment goodies, can you believe it? I also have to buy Andrew new dress shoes for his school performance; which will be the day we leave for San Diego! He's been preparing all year for this, and is really nervous, I'm hoping to have everything packed in the car and meet him at school with the whole family, including Daddy; so that right after the performance, we can leave for San Diego! So much going on this coming week, it's scary and exciting! I will post pictures of my now-mythical vintage attire once it's done, I swear!

Have a great weekend, everybody! 

Monday, February 28, 2011

Let Them Eat (Red Velvet) Cake, Then.....

Ok, I know I'm late to the Red Velvet Cake party; for the last several years it seems every show I watch about "trendy" weddings, bridal showers, sweet sixteens, and baby showers always mentions how "in" Red Velvet Cake is. The truth is, being neither "in" nor Southern, I had never tasted a red velvet cake, and had no idea what to expect. In typical budget conscious Mama fashion, it never occurred to me to buy a red velvet cake until I received a coupon for one. Now, I don't usually fall for the "two cents off if you buy 500" coupon thing, but if it is a substantial coupon for at least a few dollars, and it's an item I either would be buying anyway, or an item I can substitute for what I would have bought anyway, I'll consider it. Since I was intrigued by the idea, and it was such a great Costco coupon; I brought home a giant, scrumptious-looking red velvet cake on Saturday. Oh my goodness! I think it was the best cake I had ever tasted! After doing some research on the so-called "authentic" red velvet cake, I decided to find a great recipe and make one for our twelfth anniversary, which is coming up on May 1st. After learning plenty of contradictory do's and don'ts; I found a recipe that is as authentic as I can find.


Food Network Recipe

  • Vegetable oil for the pans
  • 2 1/2 cups all-purpose flour
  • 1 1/2 cups sugar
  • 1 teaspoon baking soda
  • 1 teaspoon fine salt
  • 1 teaspoon cocoa powder
  • 1 1/2 cups vegetable oil
  • 1 cup buttermilk, at room temperature
  • 2 large eggs, at room temperature
  • 2 tablespoons red food coloring (1 ounce)
  • 1 teaspoon white distilled vinegar
  • 1 teaspoon vanilla extract
  • Cream Cheese Frosting, recipe follows
  • Crushed pecans, for garnish

Directions

Preheat the oven to 350 degrees F. Lightly oil and flour 3 (9 by 1 1/2-inch round) cake pans.

In a large bowl, sift together the flour, sugar, baking soda, salt, and cocoa powder. In another large bowl, whisk together the oil, buttermilk, eggs, food coloring, vinegar, and vanilla.

Using a standing mixer, mix the dry ingredients into the wet ingredients until just combined and a smooth batter is formed.

Divide the cake batter evenly among the prepared cake pans. Place the pans in the oven evenly spaced apart. Bake, rotating the pans halfway through the cooking, until the cake pulls away from the side of the pans, and a toothpick inserted in the center of the cakes comes out clean, about 30 minutes.

Remove the cakes from the oven and run a knife around the edges to loosen them from the sides of the pans. One at a time, invert the cakes onto a plate and then re-invert them onto a cooling rack, rounded-sides up. Let cool completely.

Frost the cake. Place 1 layer, rounded-side down, in the middle of a rotating cake stand. Using a palette knife or offset spatula spread some of the cream cheese frosting over the top of the cake. (Spread enough frosting to make a 1/4 to 1/2-inch layer.) Carefully set another layer on top, rounded-side down, and repeat. Top with the remaining layer and cover the entire cake with the remaining frosting. Sprinkle the top with the pecans.

Cream Cheese Frosting:

  • 1 pound cream cheese, softened
  • 4 cups sifted confectioners' sugar
  • 2 sticks unsalted butter (1 cup), softened
  • 1 teaspoon vanilla extract
In a standing mixer fitted with the paddle attachment, or with a hand-held electric mixer in a large bowl, mix the cream cheese, sugar, and butter on low speed until incorporated. Increase the speed to high, and mix until light and fluffy, about 5 minutes. (Occasionally turn the mixer off, and scrape the down the sides of the bowl with a rubber spatula.)

Reduce the speed of the mixer to low. Add the vanilla, raise the speed to high and mix briefly until fluffy (scrape down the bowl occasionally). Store in the refrigerator until somewhat stiff, before using. May be stored in the refrigerator for 3 days.

Yield: enough to frost a 3 layer (9-inch) cake


Hopefully I can make a cake as gorgeous as the one in the picture! Unfortunately, I'm afraid that by May 1st, red velvet cake will be hopelessly outdated, and "out". Oh well, I've never been very trendy, anyway! 

Thursday, February 17, 2011

Flour Frenzy

This picture is a quick snapshot, of me, in my kitchen in all my red apron-ed glory....I wish! Ah, for those yellow dishes! I love yellow dishes! Unfortunately my kitchen is not as darling by half. Today is Thursday, which means that tomorrow my Andrew will be selling homemade bread for the mock economy in his classroom. My bread is in high demand there; probably because it is bought with mock money; so I try to make at least 6-8 loaves for him to sell. And that's on top of the bread I'm supposed...I mean am making for everyday use. I also am extremely backed up in the soap department, so today's tasks include one batch of Patchouli soap...which is done; and I have three loaves baking in the oven as we speak.

And it shows. I have developed a system for making the most of my tiny kitchen and limited mixing and oven space. I make one batch of bread which makes 3 loaves, using the recipe I posted earlier, let it rise in the mixing bowl for about an hour; then when it's risen, I take it out and immediately start another batch of bread in the mixer, then form the first batch into loaves, repeat until exhausted and covered in flour. If I do this properly, I should have one batch rising in the bowl, one batch rising on the baking sheet, and one batch in the oven.  Unfortunately I am terribly behind today, and at this rate will not be able to fill my kitchen from floor to ceiling with bread; although I am exhausted and covered in flour....

Off to bake more bread!

Happy Thursday!

Wednesday, February 9, 2011

I can see it in your eye; that you want to make pie....

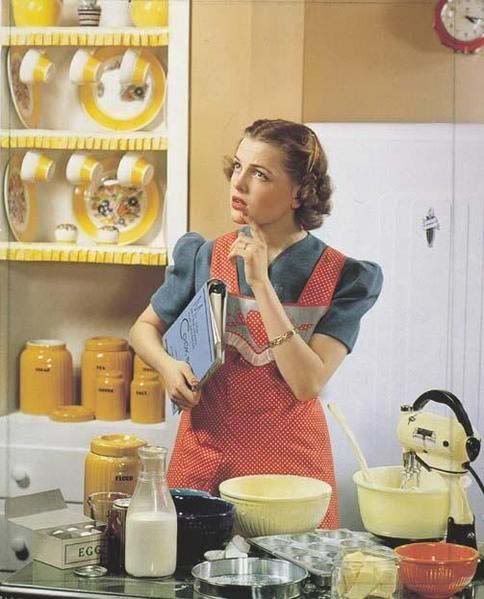
I decided to put up a post about one of my favorite things; pie. I just happen to have a half bushel of apples that are mocking me; reminding me daily by their presence that I have a million things to do that I never seem to get around to doing. So in the spirit of pie making, and with hope that I will, in fact, use the apples for the purpose with which they were intended, I decided to share a few things about pie that I have learned over the years, mostly from that lovely lady, Betty Crocker. As I talked about on an earlier post, my favorite cookbook is a reprint of a 1951 Betty Crocker; the pictures are charming, the recipes a dream. It provides a glimpse into the daily lives of my favorite of the species; 50's housewives. There is a wonderful section which gives tips on stretching the family budget as well as keeping your spirits lifted; no therapy required. I actually think I will post about those tips at a later date; they are just priceless!

I always use Betty's version of a pie crust, it's so simple! Modern cookbooks make the process seem so difficult and time consuming; when it should be....easy as pie! You don't need the finest quality butter, or a food processor, or special flour, or special equipment, just flour, shortening (I know, I know), cold water, and either a pastry blender (which is just a little hand-held gizmo), or two forks. Also, modern recipes call for a higher percentage of fat to flour, which is just not necessary. The recipe I use calls for 2/3 cup of shortening per two-crust pie, certainly not health food, but I have seen other recipes use almost equal amounts of butter to flour! And I just roll the dough out with a wooden roller, no fancy-dancy new models with Teflon, on my wooden cutting board. I would love to have a marble inset to my counter top for dough; but for now, wood it is!

The problem with making pie, is that it is a fairly time-consuming dessert, so last time I made pie, I came up with a new technique, based on something my Granny used to do while making pie. Some of my best memories of my Granny are from my visit to her home in Missouri when I was eleven, she loved pie, and loved baking pies, so my sister and I helped her while she made lots of fruit pies. She came from a time and a place where pie was a staple, more of a way to preserve and a vehicle for fruit than a fancy dessert. She told us that while she was growing up in the 1930's, her mother used to make a dozen pies at a time. I always think of that when I bake pies; and hope that my pies would be Granny-approved! I remember her making the filling and then freezing it for another time, since she didn't have enough pie tins or oven space, so last time I made pies I did something similar. I don't claim that this is completely my idea, I'm sure other ladies have figured this out long ago, but for me it was a new idea!

I simply made enough filling for an extra pie, and placed it in a pie tin with no crust, greased. I did this with cooked filling, but I'm sure you could do this with the uncooked filling as well. I then baked that pie tin with just filling until it was done, then cooled it in the pie tin and when it was cool, stuck the whole thing in the freezer. I froze it until solid, then popped the filling out of the pie tin, wrapped it in plastic, and put it back in the freezer. When I needed a fairly quick dessert some weeks later, I simply made up a pie crust in the same pie tin, added the frozen block of filling, topped with another crust, baked as usual. It made a delicious, fresh-baked pie, and since the filling is the most time-consuming part, was ready in a snap! Of course, you can also freeze entire pies, but that requires putting pie tins out of commission, but I haven't had the greatest luck defrosting whole pies, and the crust has a tendency to become soggy when frozen. 

Now, do you want to make pie?

Monday, February 7, 2011

Foolproof Busy-Day Bread.....


I posted earlier about making bread for my family and want to share the recipe I use. It's always difficult for me to share recipes, because I'm a "throw it in" kind of baker, especially when it comes to bread, but this method I use is actually based on an episode of 'Cake Boss'. Some of you may have seen it; when Buddy and family went to Italy, they stopped in a bakery that makes bread daily in a centuries-old wood fired oven. The bread looked absolutely delicious, and although I don't happen to have a centuries-old wood fired oven handy, and in fact only have a years-old floor model from Sears electric oven, it still makes awesome bread! In the episode of 'Cake Boss', the baker was asked what their secret was. He answered that it was "the air" in that particular region of Italy that made the bread so great; alas, I have no Italian air, only Idaho air, but the bread doesn't seem to notice. I make all my bread dough in my Kitchen Aid mixer that was a wedding present, and is something I still use every day and couldn't live without, but you can certainly use a little elbow grease and mix and knead the bread by hand. I developed this recipe by listening carefully, or rather, reading the subtitles when the baker said "5 grams salt per kilo flour". A rough estimate of 5 grams is 4 teaspoons, and that's the amount of salt I use per kilo, which is about 2.5 pounds. This seems like a lot of salt, and I've actually found you can reduce it a little without affecting the recipe. I should also add that instead of bread pans, I love making bread in the traditional Italian fashion, round loaves which are formed by making a simple dough ball, smoothed over with ends tucked into the bottom, slashed on top once with a knife, on a baking sheet. Cornmeal is good to sprinkle on the greased pan, but I generally forget to do this, and it's not crucial. So here goes:

Busy-Day Italian Bread

2.5 pounds unbleached flour
4 tsp. salt
4 tsp. active dry yeast
Warm water (think warm bath temperature: 100-120 degrees)

Add the dry ingredients to a stand mixer bowl, or other large bowl. Mix with wire whisk. For stand mixers, use the dough hook attachment, add warm water while mixing on the lowest setting. By hand, add some water, then mix with a wooden spoon. When dough starts coming together and pulling away from the bowl, or becomes too stiff to mix with spoon, stop adding water and mix away until a soft, slightly sticky, smooth dough forms. With mixer, continue to mix with dough hook, which kneads the dough,  for a few minutes, until everything is well mixed and the dough is smooth and while soft, is able to be removed from the bowl in a big dough ball and handled with floured hands. If you've added too much water, just add a bit more flour, but don't overdo it, it should still be a soft dough. If you're kneading by hand, knead your little heart out, it will take probably 10-15 minutes of vigorous kneading to reach the same point. Cover bowl and allow to double in size, an hour or so, then punch the dough down, divide it in half for two large loaves, form loaves on greased and cornmeal-ed baking sheet and cover with a towel. At this point preheat your oven to 400, and put the rising bread on top of your range, to allow the heat from the preheating oven to accelerate the rising process. The second rise is faster, in my oven the bread is ready to go as soon as the oven finishes preheating, probably 20 minutes to a half hour. Pop the bread in the oven and bake until golden brown, about 30 minutes. And that's all there is to it!

If anyone needs me to clarify anything or has further questions, please comment and I will respond with whatever help you need (short of actually coming to your house and baking the bread myself!). Enjoy!

I'm so sorry there are no pictures of this bread! I never thought to take any, but I will take photos later today when the bread for today is finished, to show!

Monday, January 31, 2011

The greatest thing since...

I've recently been trying to find ways to stretch my grocery budget even further. I've always been very thrifty, but because of the state of the economy in the last few years, I've had a need to keep my grocery budget the same, while at the same time joyfully expanding our family...twice! It was this need to keep costs down that led me to learn the art of soap making; and we all know how that turned out! I also cloth diaper and use cloth wipes, make my own soap (obviously) as well as laundry detergent, buy in bulk, make everything from scratch, and pretty much do everything humanly possible to get the most out of my grocery budget while still providing my family with hearty and (I hope) yummy meals day in and day out. Recently, Elvis began to eat solids, and this has put additional strain on my poor little budget, especially since he absolutely refuses to eat the homemade baby food that I intended  to be his only food, and I'm still working on getting him to eat "regular" food, since I don't believe in giving children purees for any longer than necessary. Because at the moment I am spending something like, eeek! 10 to 20 dollars a week on baby food, I decided to start making all the bread we eat with my own little hands! I've always been an avid baker, making bread to have with dinner several times a week, but I've never felt equal to the task of providing the bread for toast and sandwiches, not to mention the bagels, hamburger buns and hot dog buns that our family uses every week. We can easily go through a loaf of sliced bread a day, and although I shop at a bread "thrift" store, at an extremely reduced cost, it is still triple the cost of homemade bread, and of course, not nearly as delicious. My favorite recipe only uses one pound of flour, and a nominal amount of yeast and salt; costing only 25 cents per loaf, a far cry from the price of bread in stores. It will take some getting used to, since we are all used to eating sandwiches on uniformly sliced, abnormally soft-crusted commercial bread, which as a bonus is filled with sugar or high-fructose corn syrup, dough conditioners and preservatives, and a huge amount of sodium compared to homemade. Before they "invented" pre-sliced bread, people were used to eating toast or a sandwich on a thick, rugged slice of bread, and thought nothing of it. I hope that in my family at least, we can go back to blithely eating a hunk of bread without complaint!